User Management and Account Setup
This guide explains how to manage your team, configure permissions, set up a new HydroForecast account, and adjust profile settings.
Managing users
The Settings > Team page provides an overview of all teammates in your HydroForecast account account, including their assigned roles. To access the Settings page, hover over your user icon in the top-right corner of the HydroForecast dashboard.
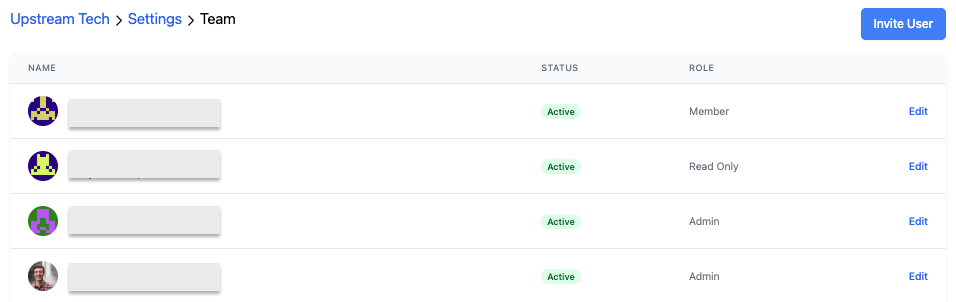
There are three types of user roles:
| Role | Description |
|---|---|
| Admin | Manage organization settings, invite Admins, and edit all profiles, access API key |
| Member | Invite Members and Read-only users, edit own profile |
| Read-only | View data only; cannot make changes |
Inviting users
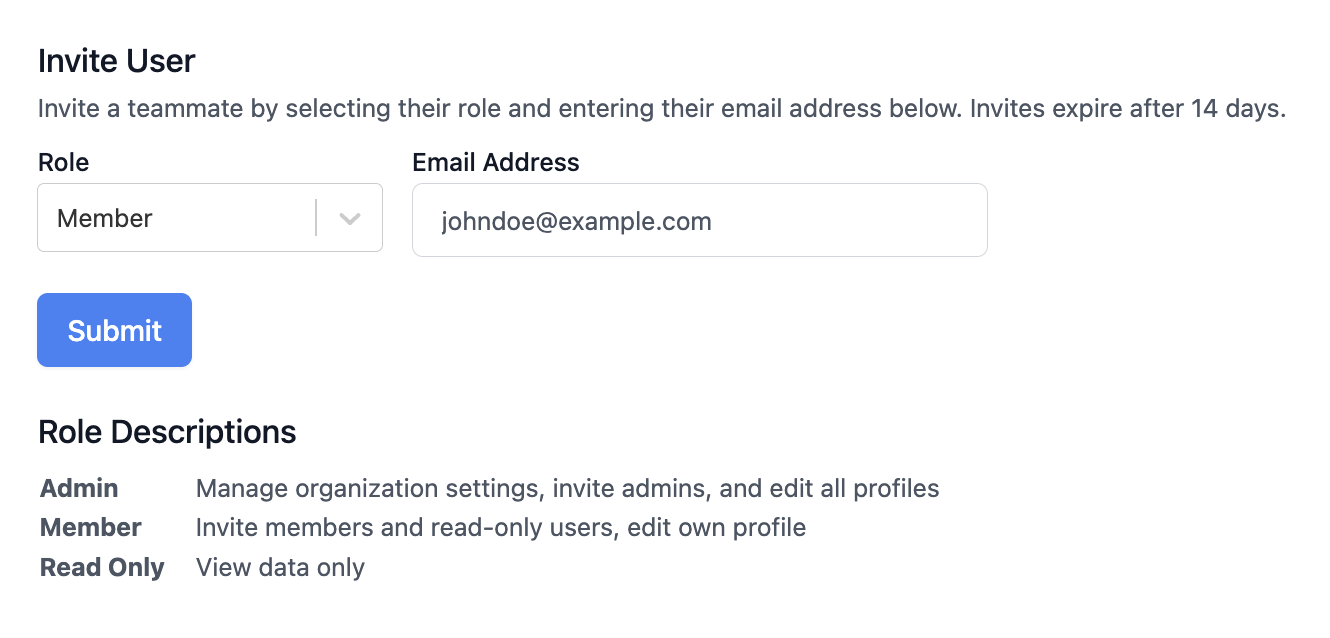
Users with Admin or Member roles can invite new users by following these steps:
- Go to the Team page.
- Click the blue Invite User button at the top right.
- Choose the appropriate role and permission level.
- Enter that teammate's email address and click submit.
Note that invite links are unique to each email address and can be used only once, and these links expire after two weeks for security reasons.
Creating an account
After receiving the email invitation to join a HydroForecast account, new users will be about to enter their name, email address, and create a strong password to proceed with creating a HydroForecast account and their designated permission level.
Note that any admin users will also be prompted to set up Multi-Factor Authentication (MFA) during signup. Learn more about MFA setup here.
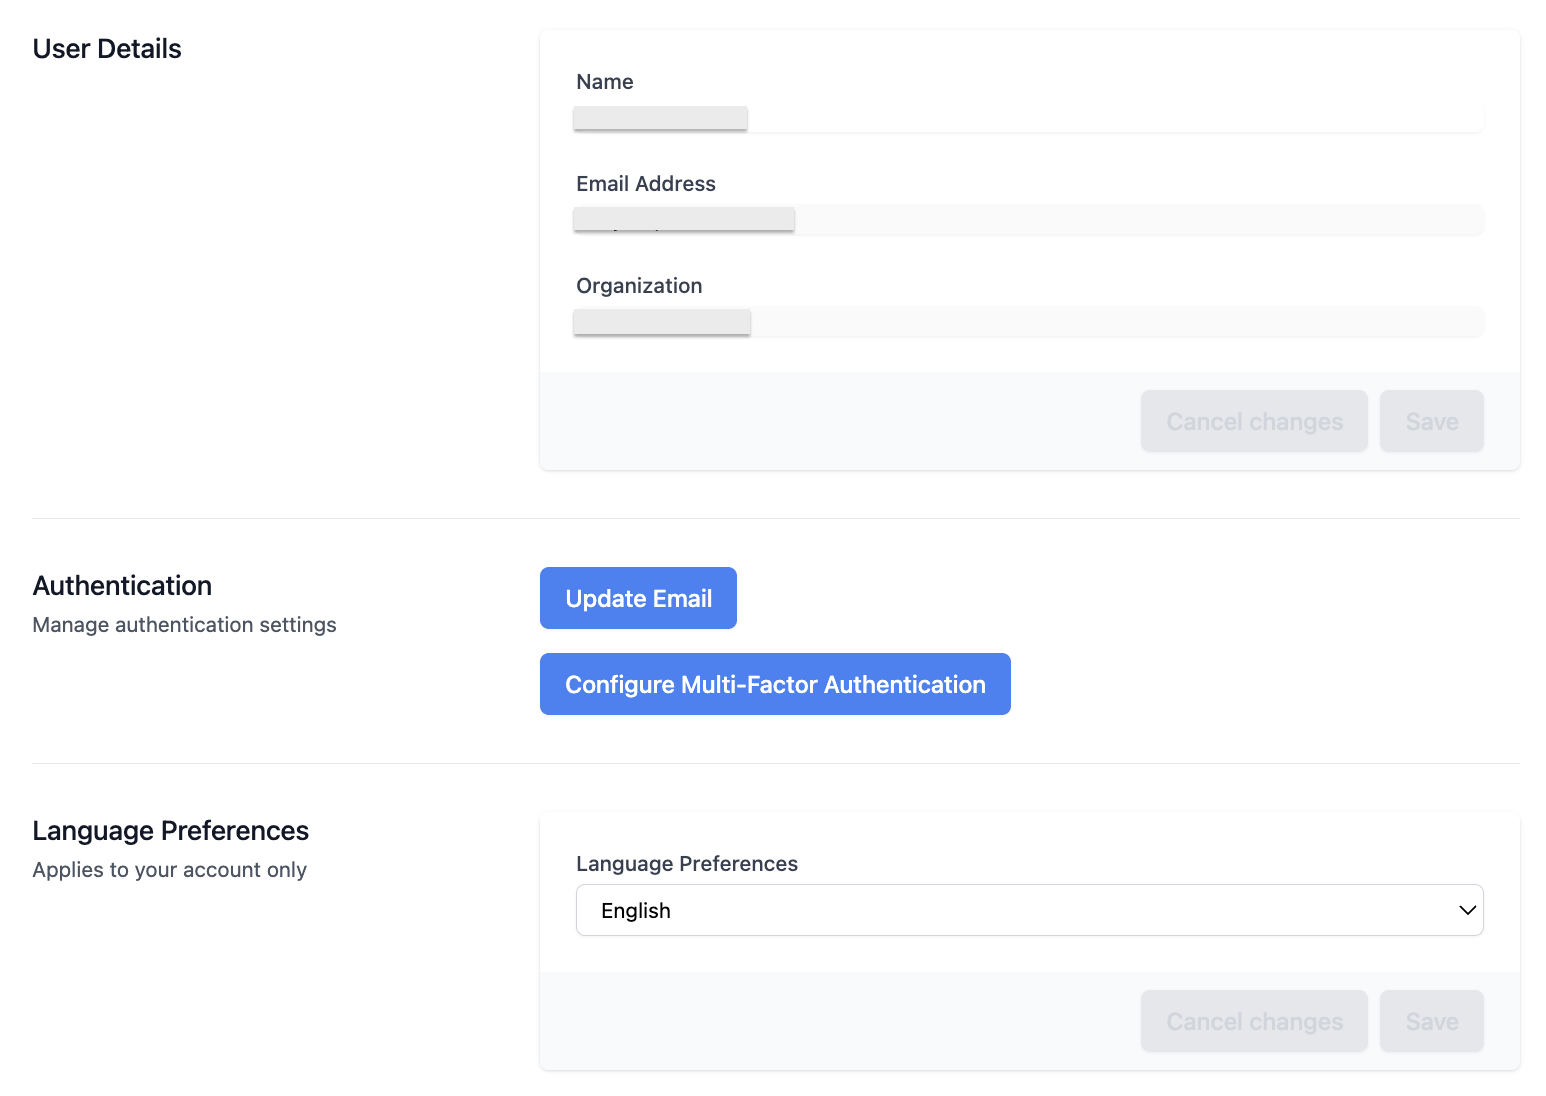
Updating your profile
Navigate to Settings > Profile to make any updates to your account such as updating your email address, setting up Multi-Factor Authentication (MFA), or choosing your preferred language for the dashboard interface -- we currently support English, Portuguese, Japanese and French, and if you'd like to see another language supported here please reach out to our team at team@hydroforecast.com.