
Seeing changes with view and compare mode
This article covers the two "modes," or ways of exploring satellite data layers in Lens: View and Compare.
- View mode
- Compare mode
- Comparing different layer types
View mode
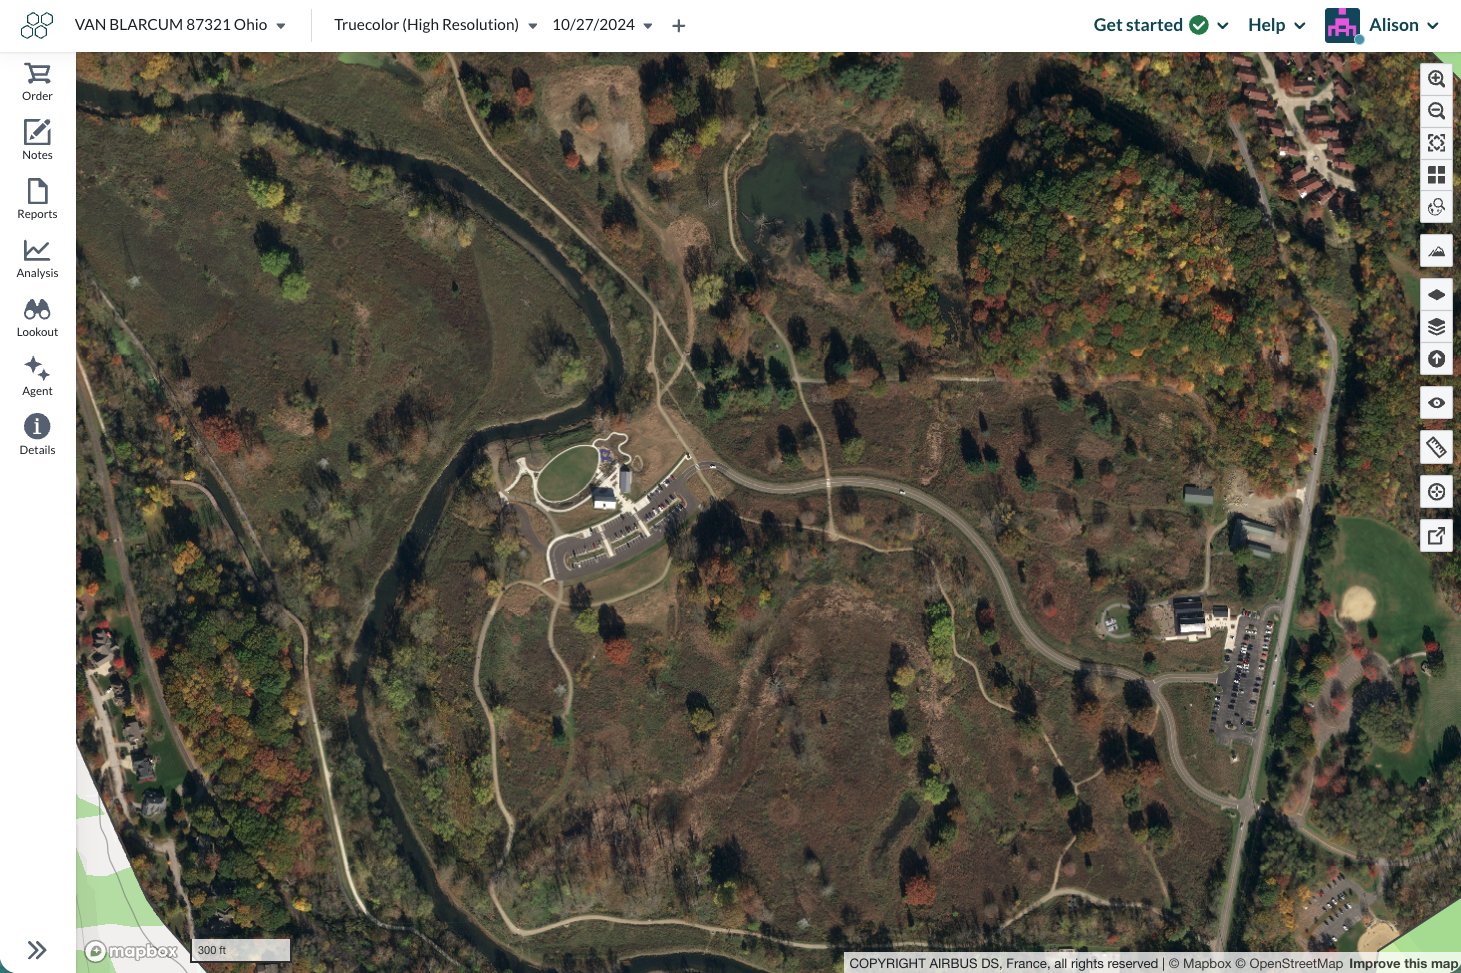
View mode allows you to view imagery or data layers for a single date. Use the layer menu and / or the date drop-down to change the scene you're viewing. In the example below we're viewing the Truecolor (High Resolution) layer with a capture date of 10/27/24.
Compare mode
Compare mode enables you to see how an area of interest has changed from one date to another. You can select two dates on the top bar and drag the slider across the images to see areas where changes might have occurred. You can compare imagery between two different time periods, or even compare different types of layers, such as truecolor, landcover, index layers, falsecolor, landcover, and more.
Click the Plus button to open compare mode, and select the layer and date in the dropdowns.

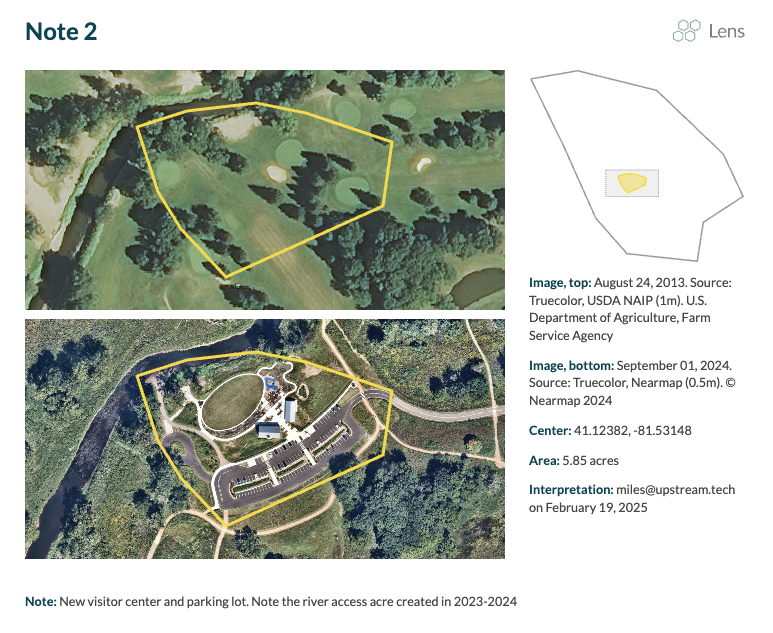
And when you notice a change worth documenting, whether it's a new building, timber harvest, or something else, you can make a note to capture your observation. If you’re in Compare mode, the note will include both of the associated images for the two time periods.

Finally, when you generate a report, the imagery for both of those dates will show up in your report, as shown below.
Comparing different layer types
In addition to comparing two truecolor images side-by-side, Compare Mode allows you to select different types of layers. This is useful for recognizing the patterns between truecolor imagery and index layers. By default, Compare Mode will open in the same layer type as the first image you have selected. You can change the layer type and date in the dropdown menus.
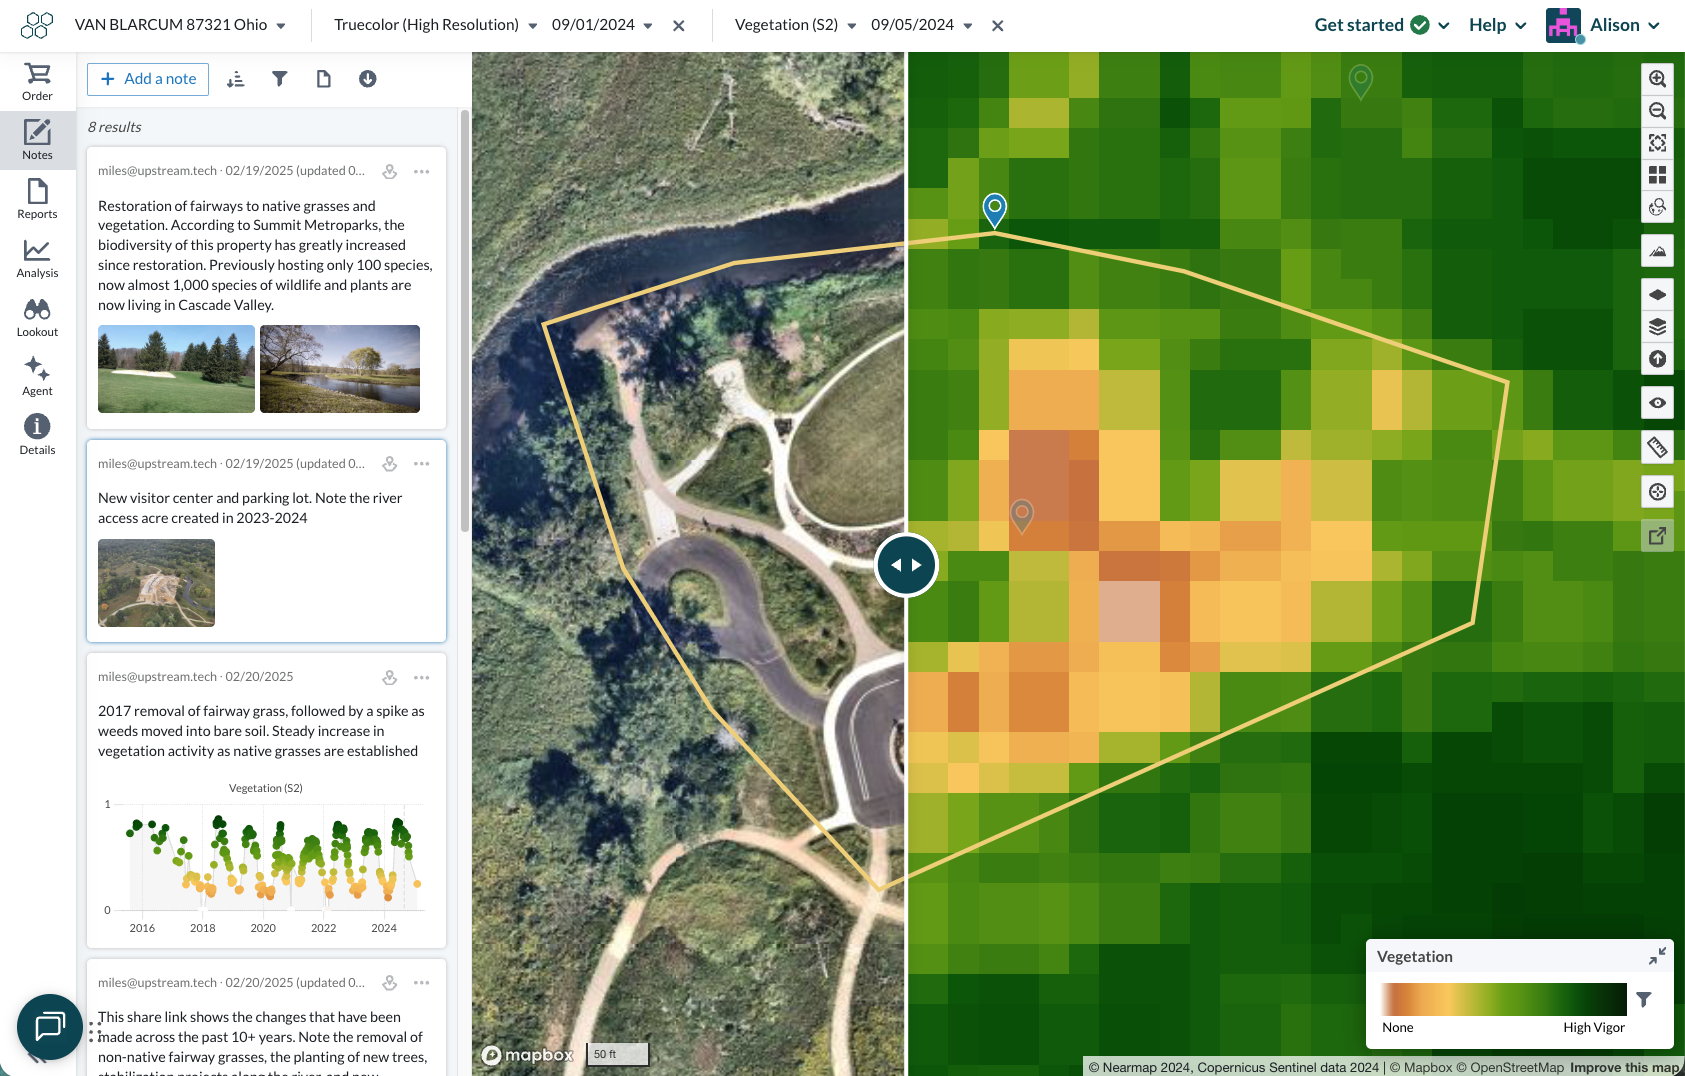
In the example above, compare mode is being used to inspect visitor center development in both Vegetation Index and truecolor imagery. The rust areas show absence of most vegetation, which is confirmed by the parking lot and buildings in the truecolor image.