Understanding the difference between layers and overlays
In Lens, Overlays and Layers provide different ways of visualizing data on the map. Both types of datasets can add valuable context to your analysis and serve distinct purposes.
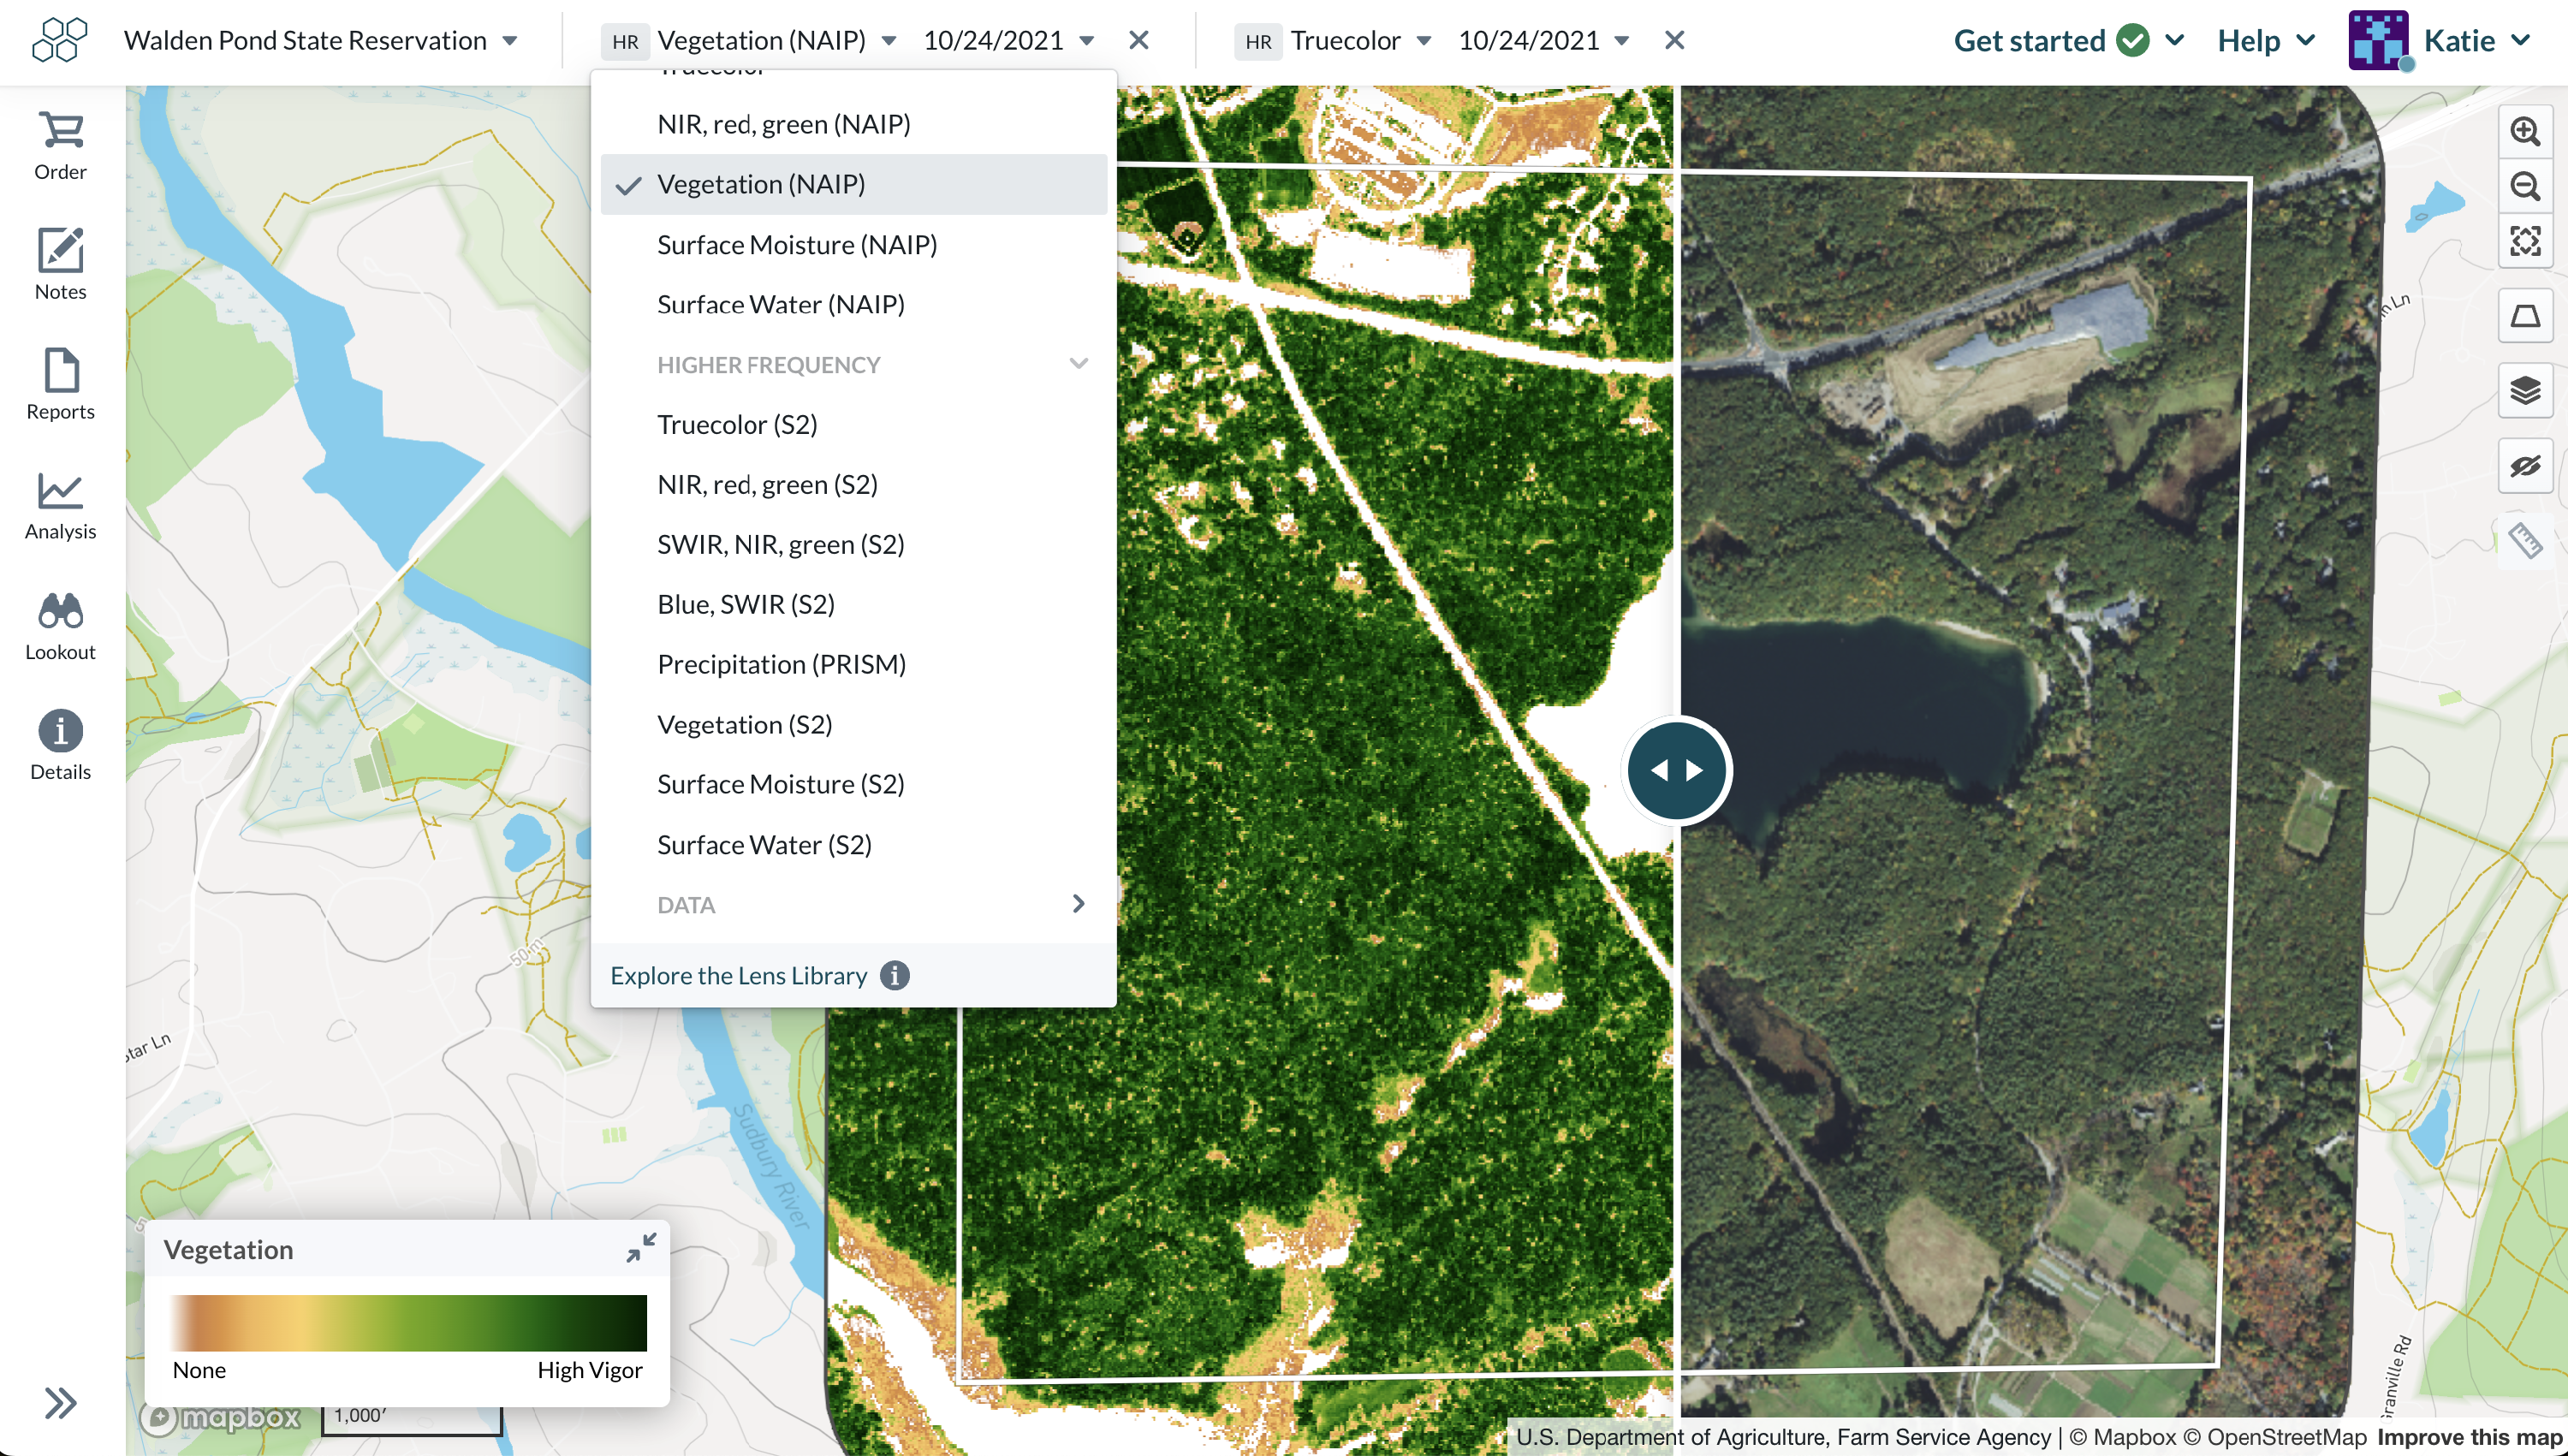
Layers
Layers are raster-based datasets where each pixel holds a specific value, such as temperature, vegetation health, or land cover. These datasets represent geospatial data such as remote imagery (satellite or aerial), remote sensing indices, or modeled environmental data. Displayed above the basemap, layers offer valuable insights for monitoring and analysis.
When making a note in Lens, the layers you are viewing at that time will be automatically linked to that note. And when using Analysis, layers provide the underlying data that Lens analyzes and visualizes in a chart.
Viewing layers on the property map
-
In the Property Map view, click the Layers dropdown at the top of the screen to select the layer you’d like to display.
-
Use the date selector on the right to choose a specific time period, or switch to compare mode to view two different time steps side by side.
-
To add more layers or remove unused ones, click the "Explore the Lens Library" button at the bottom of the Layers dropdown to manage your options.
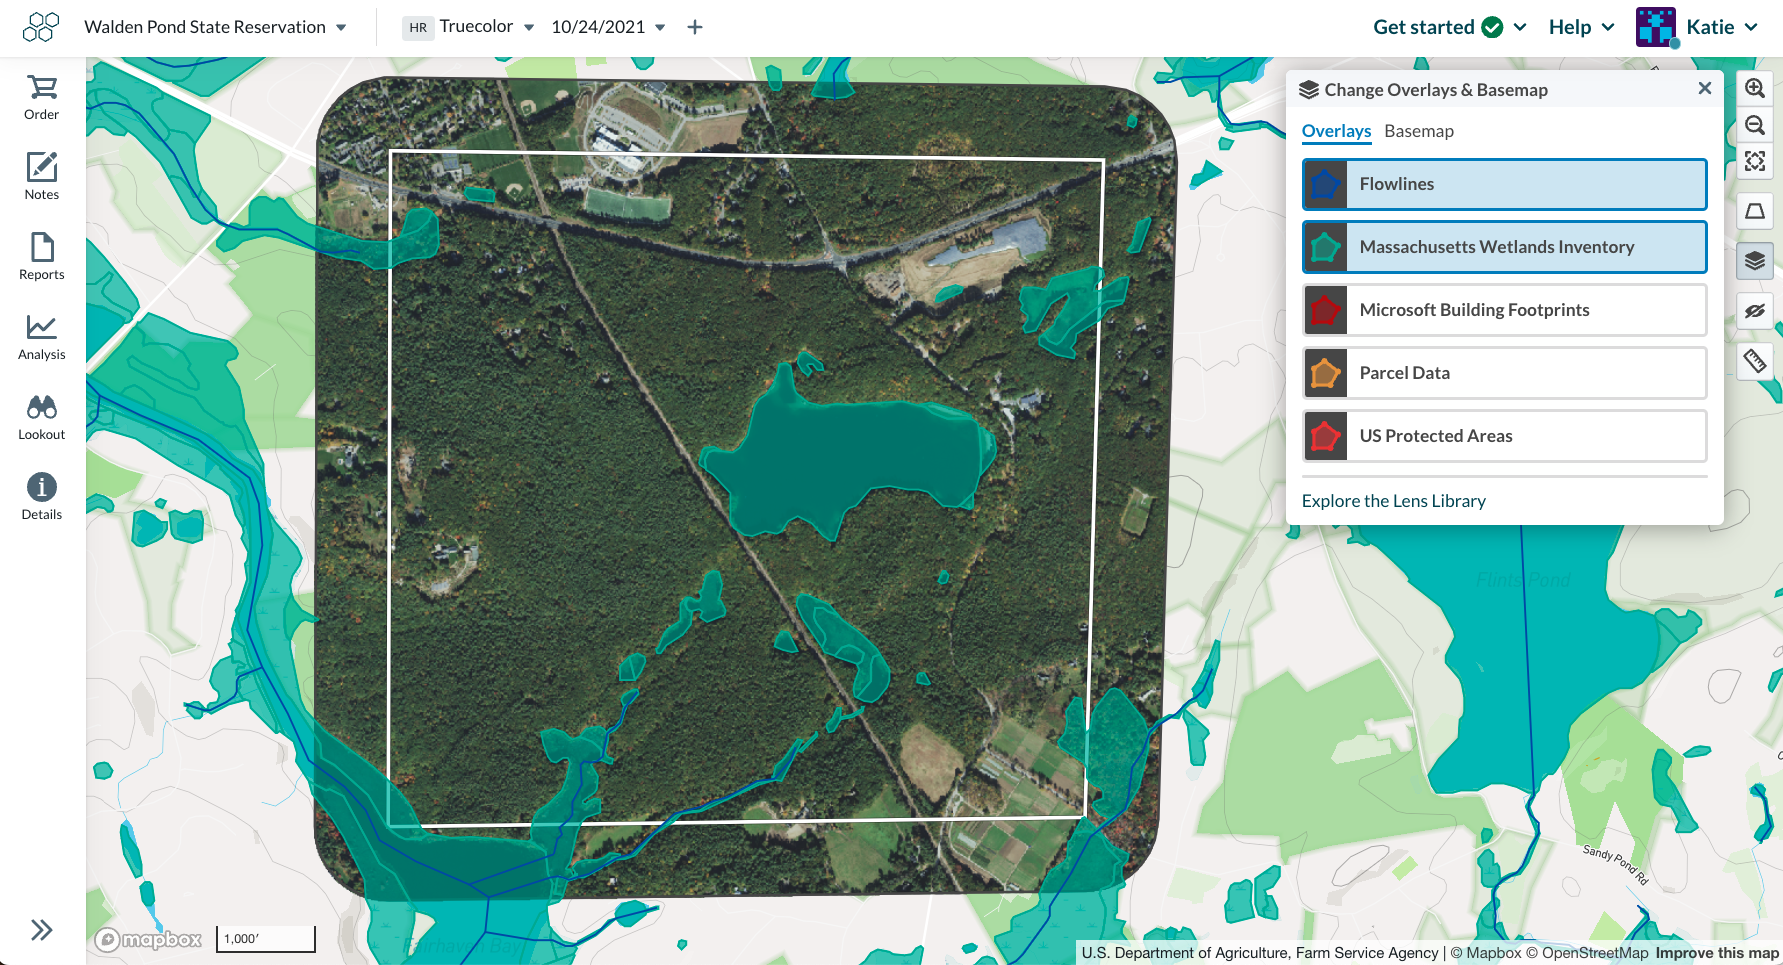
Overlays
Overlays are vector data that can be displayed on top of the map in Lens, typically on top of Layers. These consist of points, lines, or polygon geometry. Overlays represent features such as building outlines, trails, or photo points. Lens offers a few preloaded options in the Overlay Library, but Admins and Members can also upload custom overlays to further personalize their map view. Overlays provide useful contextual information and can be shown in reports. Additionally, overlays can designate the specific area for Analysis by using the 'Select overlay' option.
Viewing overlays on the property map
-
To view or hide overlays, click the “Change Overlays & Basemaps” button on the right side of the screen and select the overlays you want to display or hide.
-
You can control overlay appearance using the settings icon next to each overlay, which allows you to set it as visible or hidden by default.
-
Customize the color and fill of an overlay by clicking the colorful polygon next to its name. This helps you distinguish between multiple overlays on the map.