
Vegetation drop notifications
The Lens Lookout feature, including "Unseasonal vegetation drop", is available for Standard and Enterprise plans.
Overview
Our preset "Unseasonal vegetation drop" Lookout policy is designed to support Lens customers monitoring large properties or portfolios, ensuring that they can quickly review and respond to changes. For enrolled properties, vegetation drop notifications identify areas within your properties where a significant decrease in vegetation vigor has occurred compared to the same period in prior years.
- Activate the unseasonal vegetation drop Lookout policy
- How the unseasonal vegetation drop policy works
- Review change notifications and save as notes
- Email notifications for Lookout policies
- Customizing vegetation drop Lookout policies
Activate the unseasonal vegetation drop Lookout policy
From the Property Map page, you will see an option on the left side pane called “Lookout.” From the Lookout pane, you’ll see the option to toggle on the "Unseasonal vegetation drop" policy to activate it for this property.

You can enroll multiple properties into Lookout policies by selecting them from the Property Overview page and navigating to the Lookouts dropdown. From here you can enroll multiple properties in any custom Lookout policies you have created, as well as the preset unseasonal vegetation drop and parcel ownership change policies.

How the unseasonal vegetation drop policy works
Once enrolled, your property is automatically being monitored for unseasonal drops in vegetation vigor using Sentinel-2 data as it becomes available approximately every five days.
Specifically, our machine learning model is looking for areas where vegetation data diverges significantly (NDVI decrease of 0.38 or more) from the prior year for three consecutive sensings. Three consecutive sensings are required to trigger an alert to minimize any noise such as from clouds that were not properly masked. The spatial threshold to trigger an alert is 5 pixels, or 500 square meters. This means that changes such as small thinnings or dumping may not be detected, but changes such as a new road or fire should prompt an alert. The area where Lens detected a drop in vegetation will be outlined in red.
The text of the alert will state the date of the first Sentinel scene triggering the alert and if the drop in vegetation data was sustained for more than three scenes, it will continue to update the text with the latest scene that showed a sustained drop in vegetation data. The images appended to the alert will include the first sentinel image that triggered the alert (or the sensing closest if that first sensing has only partial coverage of the alert area) and a sensing from 1 year prior for comparison.

Review change notifications and save as notes
If a change occurs on an enrolled property, a system-generated change notification is created that indicates the date or dates over which changes were detected, as well as a red polygon indicating the area that changed. You can click on the notification to go into compare mode to see the current time period compared to a similar time period of the previous year to visually compare the changes in vegetation vigor year over year.

To quickly toggle between datasets when reviewing a Lookout notification, click the S2 Quickview button after hovering your cursor over a notification card. We recommend starting by reviewing Truecolor S2 data, and then reviewing any other datasets that may be relevant for the geography you're monitoring.
From here, you can “Save as note” or “Dismiss”. “Save as note” means that the notification text and layers will be moved into your Notes pane. The individual who saves the notification as a note will become the author of that note. However, if the change is not relevant for your monitoring purposes, you can “Dismiss” to remove it from the Lookout pane entirely.
Once you’ve determined that a change notification is important and requires follow-up, you can order high-resolution imagery for all or part of your property for further inspection, or conduct a site visit.
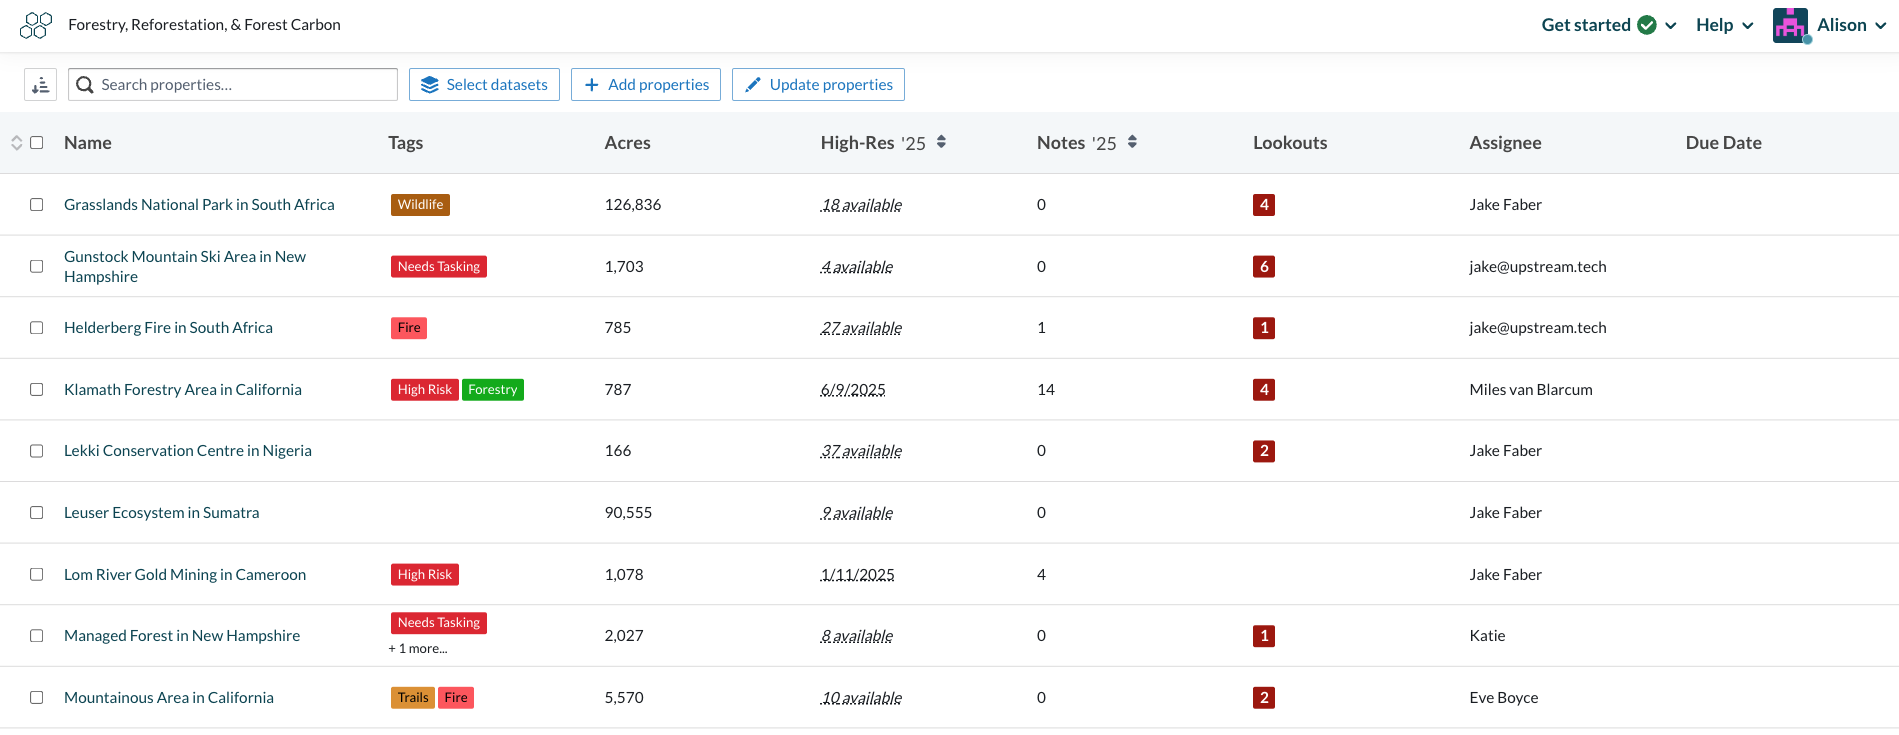
You can also view change notifications in the Property Overview page at a glance with the Lookouts column once you have enrolled at least one property in the portfolio. New change notifications will be shown in red, properties that are actively being monitored for vegetation drops will have a 0 if there are no alerts yet, and unenrolled properties will be blank.
Email notifications for Lookout policies
To ensure that you receive prompt notice of any unseasonal vegetation drops for enrolled properties, you can configure your notification preferences in Settings. Select your name in the top right and the first option in the dropdown is “Settings.”

From this page, you will see options for each portfolio, and on the right side you’ll see Changes Detected and a dropdown of options as shown below. For any new Lookout notifications on enrolled properties, you’ll see new notices at the top of your Lens Digest email.

Customizing vegetation drop Lookout policies
While the unseasonal vegetation drop policy comes readily available in Lens with the settings outlined above, there are additional ways to customize this policy to meet your specific needs. To customize a vegetation drop policy, navigate to the Lookout pane and either edit an existing vegetation drop policy or create a new policy and select 'Unseasonal vegetation drop' as the alert type.

Set spatial rules
You can set spatial rules to exclude certain overlay areas or only screen for alerts within overlay areas. In this example, we'd like to know when vegetation drops occur only within natural forest areas when regrowth. You can also specify a minimum area size to trigger an alert; this can be helpful if you don't want noise from small events and are only concerned with changes of at least 5 acres in size, for example.

Set temporal rules
Optionally, you can set a monitoring season to decide if this policy should only run during a specific time of year -- perhaps there's a specific time of year where certain activities are more likely to happen (i.e. fire season, harvests). If you set a monitoring season of June 1 - October 1, your policy will automatically run during that window of time each year. The policy will only screen for new alerts during the time window you set. 
Enroll and finalize
The final step is to enroll properties that should be monitored by this policy. This step is flexible -- more properties, or the entire portfolio, can be enrolled after completing this step.
